Anode rod water heater replacement: A step-by-step guide to protecting your tank
Pro US Plumbers ·
In this article
- Key Takeaways
- Understanding the anode rod and its role
- Choosing the right replacement anode rod
- Preparing for a safe replacement
- How to replace the anode rod
- Troubleshooting common replacement problems
- Deciding whether to replace the rod yourself
- Maintaining the new anode rod
- Further reading
- Conclusion
- Frequently Asked Questions
Key Takeaways
An anode rod quietly protects a storage-tank water heater, but it is a consumable part that needs inspection and eventual replacement.
- The rod corrodes in place of the steel tank, helping reduce internal rust.
- Water chemistry, usage, temperature, and softeners can affect how quickly it wears.
- Match the replacement rod to your heater’s model, thread, dimensions, and available clearance.
- Shut off utilities, drain the tank safely, and check carefully for leaks after installation.
- A licensed plumber is often the better choice when the fitting is seized or the tank is badly corroded.
Understanding the anode rod and its role
An anode rod is one of the least visible but most useful parts inside a tank-style water heater. It gives corrosive activity another metal to attack before the tank wall becomes the easiest target. Learning how it works helps you decide whether an inspection is timely and whether anode rod water heater replacement is a sensible maintenance project.
How the anode rod prevents tank corrosion
The rod is usually a steel core covered with a more reactive metal, such as magnesium or aluminum. When the rod and steel tank sit in water, the coating sacrifices itself through an electrochemical reaction. That process helps protect exposed steel surfaces inside the tank from corrosion.
This protection is not permanent. The rod gradually becomes thinner, rougher, and less useful as its outer metal is consumed. A healthy tank can still fail for other reasons, but a neglected anode removes one of its intended lines of defense.
Why sacrificial rods wear out over time
The word “sacrificial” describes the rod’s job rather than a special maintenance cycle. It is expected to corrode, and the rate depends on the water passing through the heater and the amount of hot water you use. Higher demand gives the rod more opportunity to react, while certain water conditions can speed the process.
Once much of the coating has disappeared, the exposed core may offer little remaining protection. That is why replacing a nearly consumed rod is usually more useful than waiting for a leak to announce the problem. A replacement cannot reverse existing tank damage, but it may restore protection when the tank is still sound.
Signs that the rod needs inspection or replacement
You cannot judge the rod accurately from the outside of the heater. A maintenance inspection requires access to the rod, usually through a large fitting on top of the tank. If the heater is older, the rod has never been checked, or hot water has developed an unusual odor or discoloration, an inspection is worth discussing.
Look for a rod that is heavily pitted, coated with scale, reduced to a thin wire, or missing large sections of its outer material. A small amount of wear is normal. Severe consumption means the part is nearing the end of its useful service, especially if the tank itself shows no signs of leaking.
How water quality affects anode rod lifespan
Water chemistry is a major variable, so no single replacement interval suits every home. Hard or corrosive water can consume a rod faster, and softened water may also change the conditions around the rod. Usage, temperature, and the heater’s design matter as well.
Keep a note of the inspection date and the rod’s condition rather than relying only on a generic calendar reminder. The USGS explanation of water hardness also treats annual inspection as a useful reference point for small electric tank heaters, particularly where water is hard or corrosive. Your own inspection history gives you a better schedule over time.
Choosing the right replacement anode rod
A replacement rod is not automatically correct just because it fits through the opening in your heater. You need to verify the heater model, connection, length, diameter, material, and the space above the tank. The right choice protects the tank without creating a difficult installation or clearance problem.
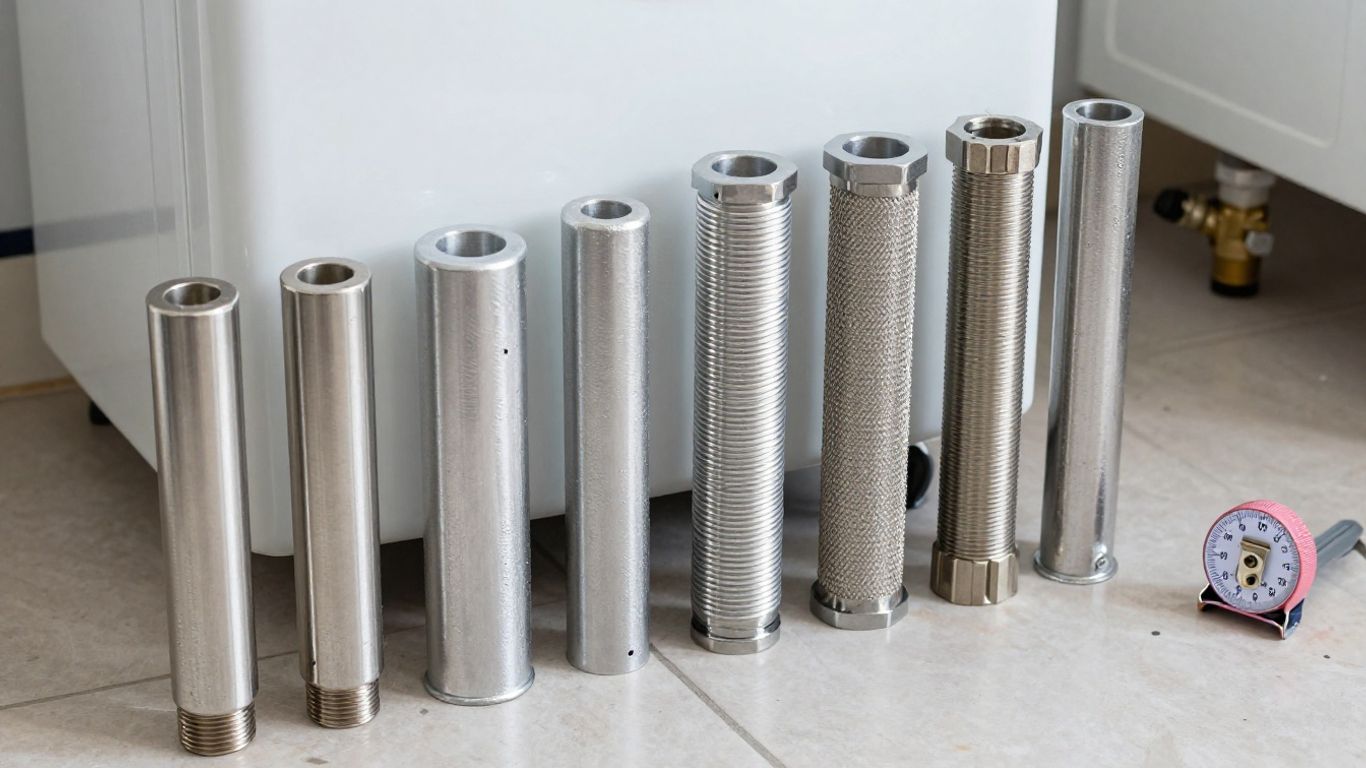
The EPA on how households use water discusses solid and flexible options as well as common rod materials and water-quality considerations. Use that kind of product information as a starting point, then confirm the specifications against your heater’s documentation.
Matching the rod to your water heater model
Start with the manufacturer, model number, tank capacity, and installation date if you have them. The owner’s manual or manufacturer parts list may identify the original rod and its thread specification. If you cannot find the manual, photograph the rating plate and measure the accessible fitting before ordering.
Do not assume that two heaters with the same capacity use identical rods. Connections, lengths, and top clearances can differ between models. A plumbing supply specialist or licensed plumber can help verify the part when the label is unreadable or the original rod is already badly damaged.
Comparing magnesium, aluminum, and aluminum-zinc rods
Magnesium, aluminum, and aluminum-zinc formulations are common choices, but their behavior in your water may differ. Magnesium is often selected for strong sacrificial action, while aluminum-based options may be useful in situations where a different consumption rate or water response is preferred. The correct material depends on the heater and local conditions, not simply on the lowest price.
Use this comparison as a practical starting point rather than a substitute for the manufacturer’s recommendation:
| Rod material | General consideration | Best next check |
|---|---|---|
| Magnesium | Often sacrifices readily in suitable water | Confirm compatibility and expected service life |
| Aluminum | May suit some heaters and water conditions | Check the manufacturer’s approved material |
| Aluminum-zinc | A multi-metal option used in some installations | Verify the exact alloy and fitting specification |
The table narrows the discussion, but it does not tell you which rod belongs in every home. If your previous rod wore out unusually quickly or caused persistent odor, discuss the material choice before installing the same type again.
Choosing between rigid, flexible, and segmented designs
A rigid rod works well when there is enough vertical space above the heater to lift the entire part out. In a low basement, closet, or utility room, the ceiling may make removal impossible even when the rod itself is the correct length. Flexible and segmented designs can be maneuvered through tighter spaces.
A flexible rod is not a license to ignore dimensions. It still needs the correct thread and enough length to provide useful protection inside the tank. Segmented sections can simplify installation, but they should be assembled and installed according to the product instructions so they do not interfere with the tank or other components.
Checking dimensions, thread size, and clearance requirements
Before you order, compare the rod’s diameter, overall length, thread size, and fitting style with the heater’s requirements. Measure from the top fitting to the ceiling and allow room for a socket, breaker bar, or other tool. Also consider nearby pipes, venting, insulation, and the space needed to tilt a rod during removal.
A rod that is slightly shorter may not provide the intended coverage, while one that is too long may be impossible to install. Record your measurements and keep the old part nearby until the replacement has been checked against it.
Preparing for a safe replacement
Water heaters combine hot water, stored pressure, electricity or gas, and heavy components. Preparation is not busywork; it reduces the chance that a rushed repair becomes a scald, electrical, gas, or water-damage incident. Give yourself enough time to shut down and drain the system properly.
You should also decide in advance what you will do if the fitting will not loosen. A seized anode rod is common enough that you should not place your body, water lines, or gas piping in a position where extra force could damage them.
Tools and materials to gather
Gather the tools before you turn the heater off. The exact socket size varies, but an appropriately sized deep socket, ratchet or breaker bar, penetrating oil, pipe wrench or holding tool, thread sealant suitable for the connection, and replacement rod are typical considerations.
A practical preparation list may include:
- A deep socket and breaker bar sized for the anode fitting
- A hose, drain pan, and buckets for controlled drainage
- A replacement rod with verified dimensions and thread
- Thread-sealing material approved for potable-water plumbing
- Towels, gloves, eye protection, and a flashlight
Having these items ready keeps you from leaving a partially drained heater unattended while you search for a missing tool. It also gives you a chance to discover that the new rod is the wrong length before the old one has been removed.
Shutting off power, gas, and water
For an electric heater, switch off the correct breaker and confirm that power is absent before working near the heater. For a gas heater, set the control to the appropriate off or pilot position according to the manufacturer’s instructions, and do not disturb gas connections. Close the cold-water supply valve above the tank.
If you are uncertain which breaker, valve, or control applies, stop and get help. The International Code Council similarly begin with shutting off utilities and the water supply before access work starts. Never restore heat to an electric heater while the tank is partly empty.
Draining the tank and relieving pressure
Open a hot-water faucet somewhere in the home to reduce pressure, then connect a hose to the drain valve and route it to a safe discharge point. Water may remain hot, so test it cautiously and use protective gloves. Open the drain valve gradually and allow enough water out to bring the level below the anode opening.
Drainage can be slow when sediment blocks the valve. Do not force a brittle drain valve or leave a hose connection aimed where it can flood finished surfaces. Once the water level is lower, keep the faucet open while you work so pressure does not rebuild unexpectedly.
Planning for limited installation clearance
Measure the path the old rod must travel, not just the height of the heater. You may need to bend or cut a removed rod for disposal, but a new rigid rod cannot be shortened casually without changing its construction. If the ceiling prevents a straight lift, choose a suitable flexible or segmented replacement before beginning.
Move fragile items away from the work area and protect flooring from the hose and drained water. If the heater is wedged tightly into a closet, professional help may be safer than forcing the tank or stressing connected piping.
How to replace the anode rod
Once the heater is isolated, the tank is partly drained, and the replacement has been checked, the job follows a fairly direct sequence. The difficult moment is often the first turn of the old fitting, not the installation of the new part. Work slowly and keep checking that the tank, pipes, and surrounding surfaces remain stable.
This is maintenance for a sound tank, not a repair for an active leak. If you see water escaping from the tank body or severe rust around the fitting, stop and reassess before proceeding.
Removing the old anode rod
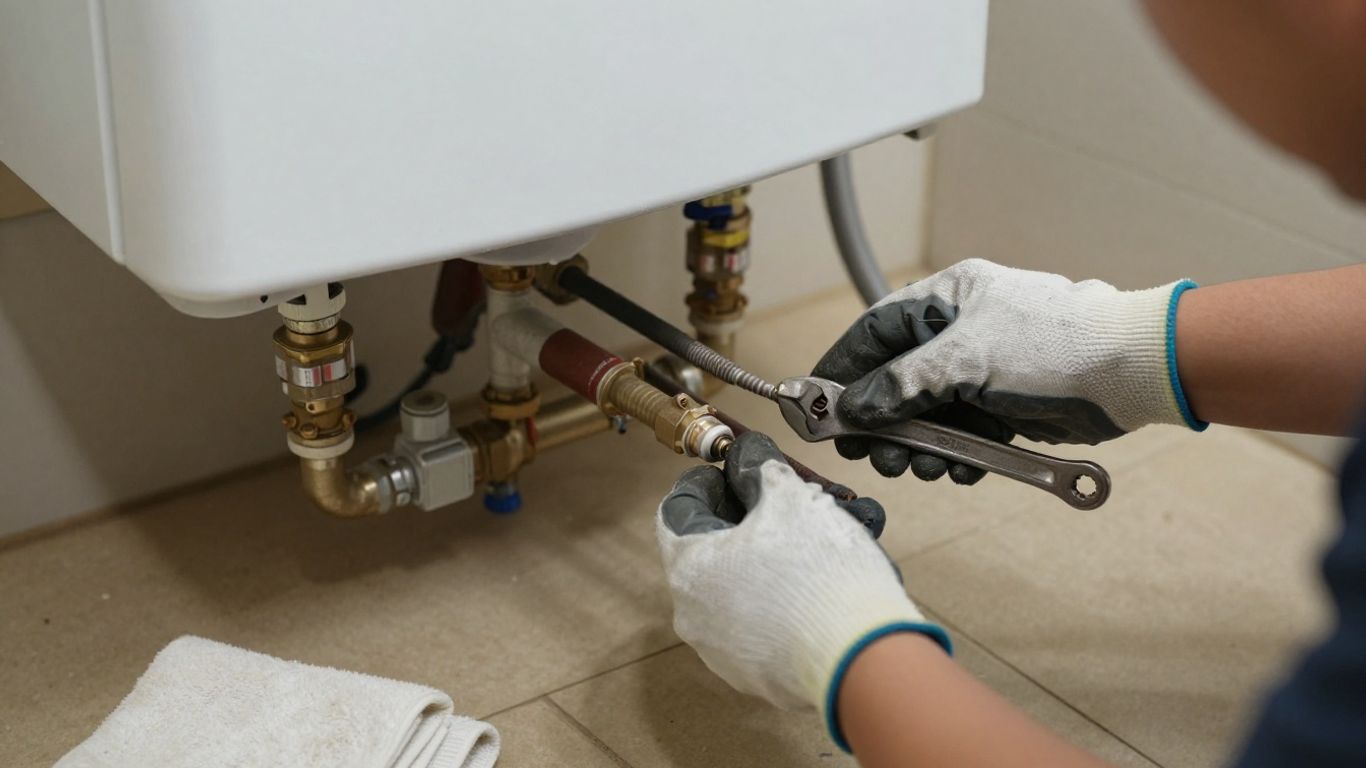
Locate the anode fitting on top of the heater and remove any cap or insulation that obscures it. Seat the correct deep socket fully on the fitting, then use controlled force while keeping the tank from twisting. Once the fitting moves, unscrew it carefully and lift the rod out as far as the clearance allows.
Inspect the removed rod before discarding it. Note the amount of remaining material, the condition of the core, and any heavy scale or unusual deposits. Those observations can guide your next inspection interval and help explain why the replacement is needed.
Breaking loose a seized fitting
A fitting that has not moved in years may be bonded by corrosion, sealant, or simple over-tightening. Apply penetrating oil only where appropriate, allow time for it to work, and use a stable tool setup. Do not use the connected water or gas lines as a brace, and do not keep increasing force when the tank begins to shift.
An impact tool may help in some professional setups, but it can also transmit force abruptly. If the fitting remains stuck, the tank twists, or the socket begins to slip, stop before damaging the heater or injuring yourself. This is a sensible point to call a plumber.
Installing and sealing the new rod
Compare the new rod with the old one before installation, then apply the recommended thread sealant to the fitting without covering areas that should remain clear. Start the fitting by hand so the threads engage cleanly. Tighten it with the correct socket according to the heater or rod manufacturer’s instructions; avoid treating maximum force as a substitute for a torque specification.
The new rod should sit securely without contacting unrelated components inside the tank. If it will not start smoothly, remove it and inspect the threads rather than forcing it. A damaged connection can leak even when the fitting feels tight.
Refilling the tank and checking for leaks
Close the drain valve, remove the hose, and open the cold-water supply slowly. Leave a hot-water faucet open until air is purged and water flows steadily. Inspect the new fitting and the drain valve while the tank refills, using a dry towel to make small leaks easier to spot.
Keep the heat source off until the tank is completely full. After restoring operation according to the manufacturer’s procedure, check the fitting again during the first heating cycle and later the same day. A slow leak deserves attention before it reaches insulation, flooring, or electrical components.
Troubleshooting common replacement problems
Most problems during anode rod replacement fall into a few familiar categories: access, corrosion, sealing, and uncertainty about the tank’s condition. The safest response is usually to pause and identify the cause rather than improvising with greater force. A small delay is cheaper than a damaged tank or flooded room.
Keep the heater isolated while you troubleshoot. Do not relight a gas appliance or energize an electric element simply to test a connection that has not been inspected.
What to do when the old rod will not budge
Confirm that the socket is the correct size and fully seated, then check that the tank is stable and the surrounding connections are not being loaded. A longer breaker bar can increase leverage, but it also increases the risk of twisting the heater. Never strike a fitting in a way that could damage the tank or nearby piping.
If safe, controlled attempts fail, a plumber can bring the proper tools and decide whether removal is worth the risk. The practical goal is not merely to win against the fitting; it is to preserve the tank and the plumbing around it.
How to handle a damaged or missing anode rod
A rod that comes out in pieces may leave sections inside the tank. Do not automatically push fragments deeper or install a new rod over an obstruction. Use the opening to inspect what you can, and seek professional advice if the core, fitting, or tank interior appears damaged.
If the rod is already missing, treat that as a sign that the heater has been without its intended sacrificial protection. Replacement may still be worthwhile when the tank is dry and structurally sound, but it cannot restore metal that has already corroded away.
Why water may leak around the new fitting
Leaks commonly result from dirty or damaged threads, insufficient or unsuitable sealant, cross-threading, or a fitting that was not tightened as directed. Shut off the water and relieve pressure before removing the new rod for inspection. Clean only in a way that does not send debris into the tank or damage the connection.
After correcting the issue, refill slowly and dry the area completely. If the leak returns, the fitting or tank opening may be compromised. Do not conceal a persistent leak with extra sealant layered over the outside.
When tank corrosion makes replacement impractical
Anode replacement makes the most sense when the tank is still sound. Widespread rust, bulging, water around the tank body, repeated leaks, or a visibly deteriorated top opening can indicate that the appliance is nearing failure. A new rod cannot repair a weakened tank wall.
At that stage, compare the cost and risk of continued work with replacement of the water heater. If water is actively escaping, shut off the supply and heat source and arrange qualified service promptly.
Deciding whether to replace the rod yourself
This job is within the reach of some experienced homeowners, but it is not a good first plumbing project for everyone. The fitting can be extremely tight, the tank can contain scalding water, and a mistake can cause flooding or damage to a gas or electrical appliance. Your decision should account for the whole setup, not just the number of steps.
Pro US Plumbers connects homeowners with independent plumbers in their area. The plumbers you hear from are independent businesses, not employees or agents of ours, so confirm each one’s license and insurance yourself before you hire. That can be useful when you need a qualified person quickly and want the service process explained before anyone arrives.
Skill and safety considerations
You should be comfortable identifying the water shutoff, electrical breaker or gas control, drain path, and heater rating plate. You also need enough physical control to stabilize the tank while loosening the fitting. Protective equipment and careful handling matter more than confidence.
Skip the DIY route if you cannot verify that the heater is de-energized, if the drain valve is unreliable, or if the work area is cramped and wet. A controlled stop is a safe decision, not a failure to finish the project.
Situations that call for a professional plumber
Call a professional when the fitting is seized, the tank shifts under moderate force, the heater leaks from its body, or the rod has broken inside the opening. Gas odors, damaged wiring, uncertain controls, and inaccessible installations also deserve qualified attention.
Pro US Plumbers is a referral service: it puts your request in front of independent plumbers who work nearby. Ask what the visit includes and whether the plumber will provide an estimate before work begins.
Typical replacement costs and labor factors
The total price depends on the rod material and design, heater access, drainage difficulty, local labor rates, and whether the old fitting comes out normally. A straightforward replacement costs less than a job requiring specialized removal, broken-part extraction, or correction of a leaking connection.
Request a price range that separates the part, labor, diagnostic or trip charges, and any likely additional work. Pro US Plumbers can put your job in front of independent plumbers locally.
How warranty requirements may affect the job
Review the water heater warranty and maintenance instructions before changing the rod. Some manufacturers specify approved parts, service procedures, or documentation. Keep the receipt, model information, inspection date, and photographs of the old and new rod when practical.
Warranty language varies, so do not assume that a replacement automatically preserves or voids coverage. If the heater is relatively new, contacting the manufacturer or an authorized service provider before beginning may prevent an avoidable dispute.
Maintaining the new anode rod
Installing a fresh rod is the start of a maintenance habit, not the final step. Record the material, length, installation date, and condition of the old rod. That simple record gives you a baseline for judging how quickly the new one is being consumed.
Regular checks also give you a chance to notice sediment, unusual hot-water color, leaks, or changes in heating performance before they become a larger service call. The best schedule is the one that reflects your actual water and usage conditions.
When to inspect the rod again
A yearly inspection is a reasonable starting point for many tank heaters, especially when the rod’s previous condition is unknown. After you have seen how much material was consumed, you can adjust the interval. A rod that looks nearly spent should be checked sooner than one with substantial coating remaining.
Mark the inspection date on the heater record or household maintenance calendar. If the fitting was difficult to remove, professional inspection may be safer than repeating a high-force removal yourself.
Adjusting the maintenance schedule for hard water
Hard, corrosive, or heavily softened water may shorten rod life. High household usage and elevated temperature can also change the pace of consumption. If your first replacement shows rapid wear, shorten the inspection interval rather than waiting for a standard multi-year estimate.
Water treatment changes can alter the maintenance pattern as well. After installing or servicing a softener, inspect the rod on the earlier side and use what you observe to set a more realistic schedule.
Flushing sediment from the water heater
Sediment can collect at the bottom of the tank and reduce efficiency or complicate draining. Follow the heater manufacturer’s instructions for flushing, and make sure discharged water can flow somewhere safe. The water may be hot, and a stuck drain valve should not be forced casually.
Flushing is separate from replacing the anode rod, but the tasks often fit into the same maintenance plan. If the drain produces heavy debris, the valve leaks, or the tank will not drain, arrange service rather than repeatedly manipulating a failing valve.
Extending tank life with regular inspections
An inspection cannot guarantee a particular service life, but it can reveal a consumed rod, loose fitting, sediment buildup, or early leak. Keep the area around the heater clear enough to see moisture and reach the shutoff. Check after maintenance and after any change in hot-water performance.
For a broader explanation of the sacrificial component and common warning signs, the IAPMO, which publishes the Uniform Plumbing Code is a useful reading companion. Small checks performed consistently are easier to manage than an emergency response after the tank has failed.
Related articles
Tankless water heater pros and cons: Is one right for your home? and Salty water from softener: causes, safety concerns, and effective fixes cover other plumbing questions you may run into.
Further reading
For more background, see the FTC consumer advice and the ENERGY STAR gas tankless water heaters. It is also worth reading the National Association of Home Builders and the Water Quality Association.
If you would rather not sort this out alone, Water heater repair and installation and independent local plumbers in your area can contact you directly.
Water filtration and softeners and Pricing guide: how plumbers charge and how to get a fair written quote may also be useful before you decide.
Request form: describe the problem so independent local plumbers can contact you and Where requests can be sent from: states and metros may also be useful before you decide.
About: how this referral service works and All plumbing service lines may also be useful before you decide.
Home: request a local plumber may also be useful before you decide.
Conclusion
Anode rod water heater replacement is a practical way to maintain a sound tank when you choose a compatible rod, work safely, and monitor the result afterward. If the fitting is seized, the tank is corroded, or the installation feels unsafe, qualified help can protect both your home and the appliance.
Frequently Asked Questions
What does an anode rod do in a water heater?
It provides a more easily consumed metal for corrosive activity to attack, helping protect the steel tank. Because the rod is consumed over time, it must be inspected and replaced when substantially worn.
How often should you replace an anode rod?
There is no universal interval. Many homeowners begin with an annual inspection, then adjust replacement timing based on water chemistry, usage, heater temperature, and how quickly the rod is wearing.
Can you replace an anode rod without draining the whole tank?
You usually need to lower the water level below the anode opening and relieve pressure, but a full drain is not always necessary. Follow the heater instructions and use caution because the remaining water may still be hot.
What if the anode rod is stuck?
Do not keep increasing force if the tank shifts, the socket slips, or nearby piping is stressed. Stop, stabilize the work area, and call a qualified plumber if controlled removal is unsuccessful.
Which anode rod material is best?
Magnesium, aluminum, and aluminum-zinc rods can all be appropriate in different systems. The heater manufacturer’s requirements, your water conditions, and the old rod’s wear pattern should guide the choice.
Can a new anode rod stop an existing tank leak?
No. A new rod may protect a sound tank, but it cannot repair a leak through the tank wall or reverse severe corrosion. Active leakage requires prompt evaluation and may call for heater replacement.
Should you hire a plumber for anode rod replacement?
Hire one if you are uncomfortable isolating the heater, working around gas or electricity, handling a heavy fitting, or judging tank condition. Professional help is also wise when access is tight or the old rod will not budge.